In part 2 of this blog series, we’ll share our final tip on creating a brand experience and take you through a trendy in-town book launch party from start to finish!

Sweetwood Style
Event Design Inspiration & All Things Creative
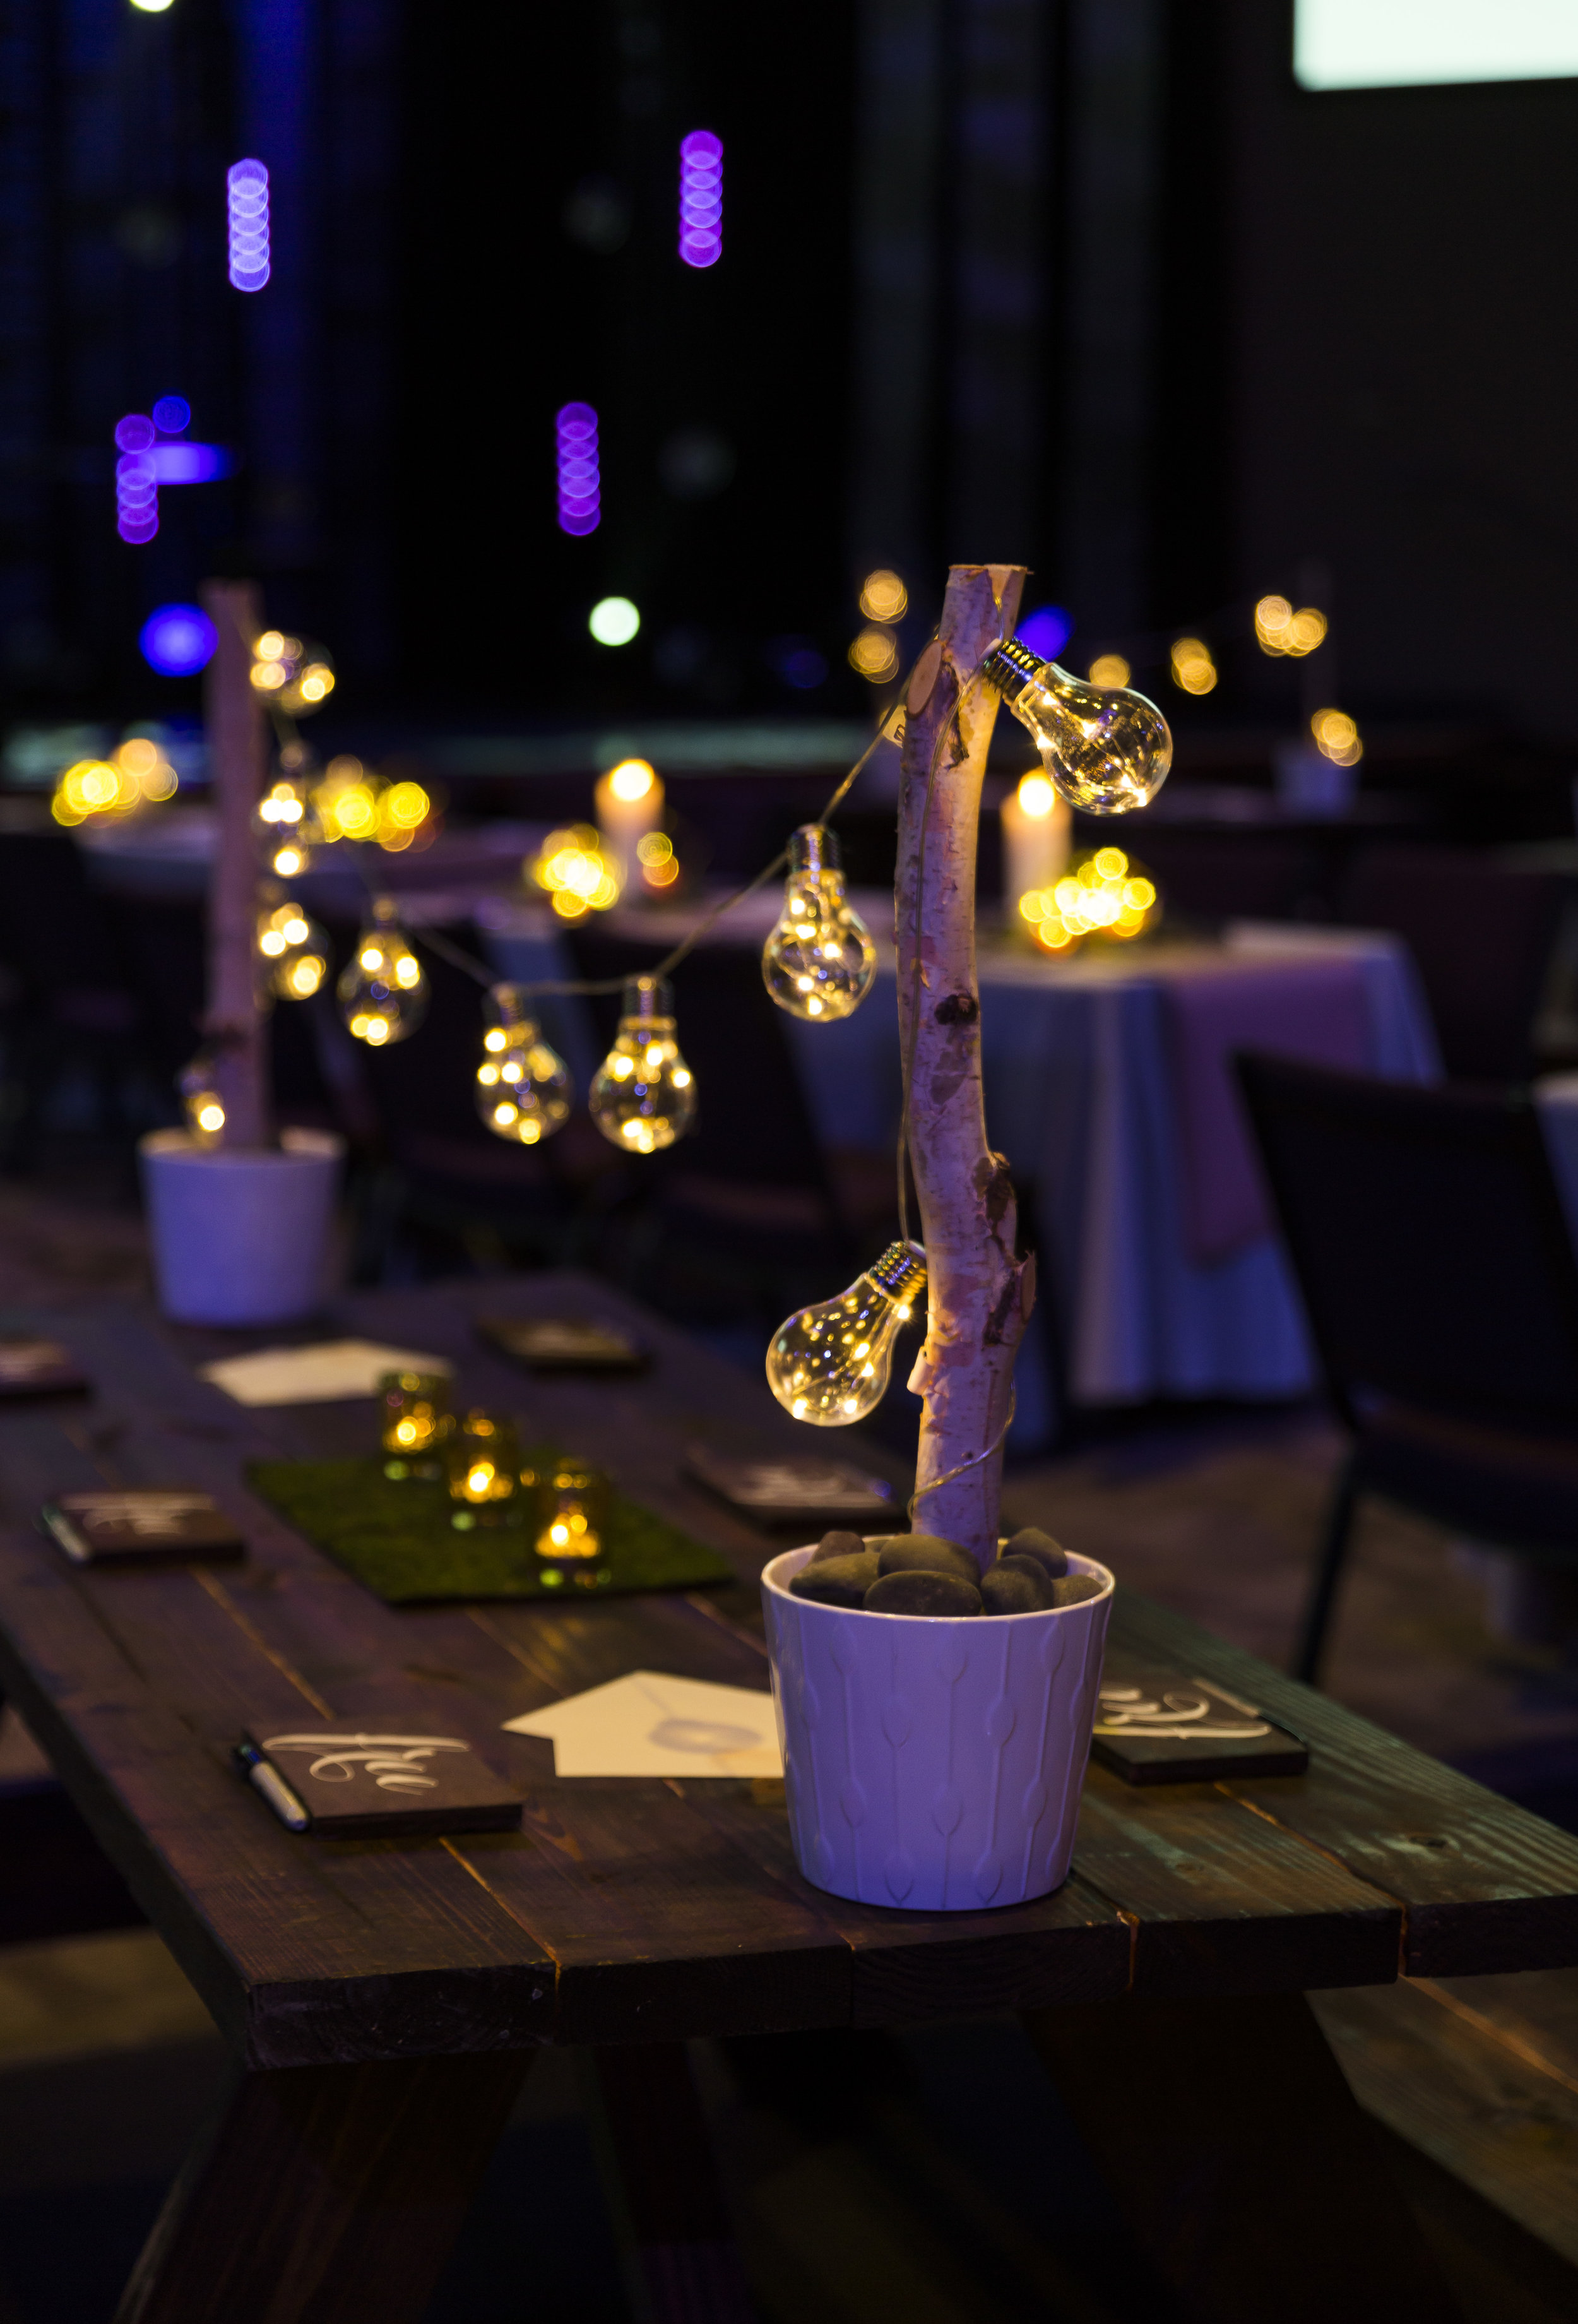
Today I'm excited to bring you a tutorial for my favorite custom centerpiece I've built to date! We made these beauties to complement some picnic tables we had rented for our event - it was a great way to bring the outdoors inside and create a cozy, rustic and casual environment.
IKEA MUSKOT Plant Pot - 9 1/2" (2 per centerpiece)
10 ct. Battery Operated Edison String Lights - I got mine at World Market (no longer available) but you can find similar HERE at Target.
4ft Birch Sticks 3-Pk from Hobby Lobby (they don't have them online) $15.99/set of 3, but use your HL app for 40% off!
GREAT STUFF 16 oz. Gaps and Cracks Insulating Foam Sealant with Quick Stop Straw - Home Depot (I used 2 cans for 15 sets of centerpieces)
Vigoro 0.4 cu. ft. Mexican Beach Pebbles - 2 bags for 15 sets of centerpieces (you could also use moss or something else to fit your theme/style!)
Rubber gloves (for use with the spray foam)
Tape of some sort (masking or gaff recommended) to help hold sticks in place while they dry
TOTAL COST PER CENTERPIECE: All in all, it cost us about $35 per centerpiece set. And the great thing is that we've already used these in multiple events - they are super versatile and add a touch of a soft glow to any room!
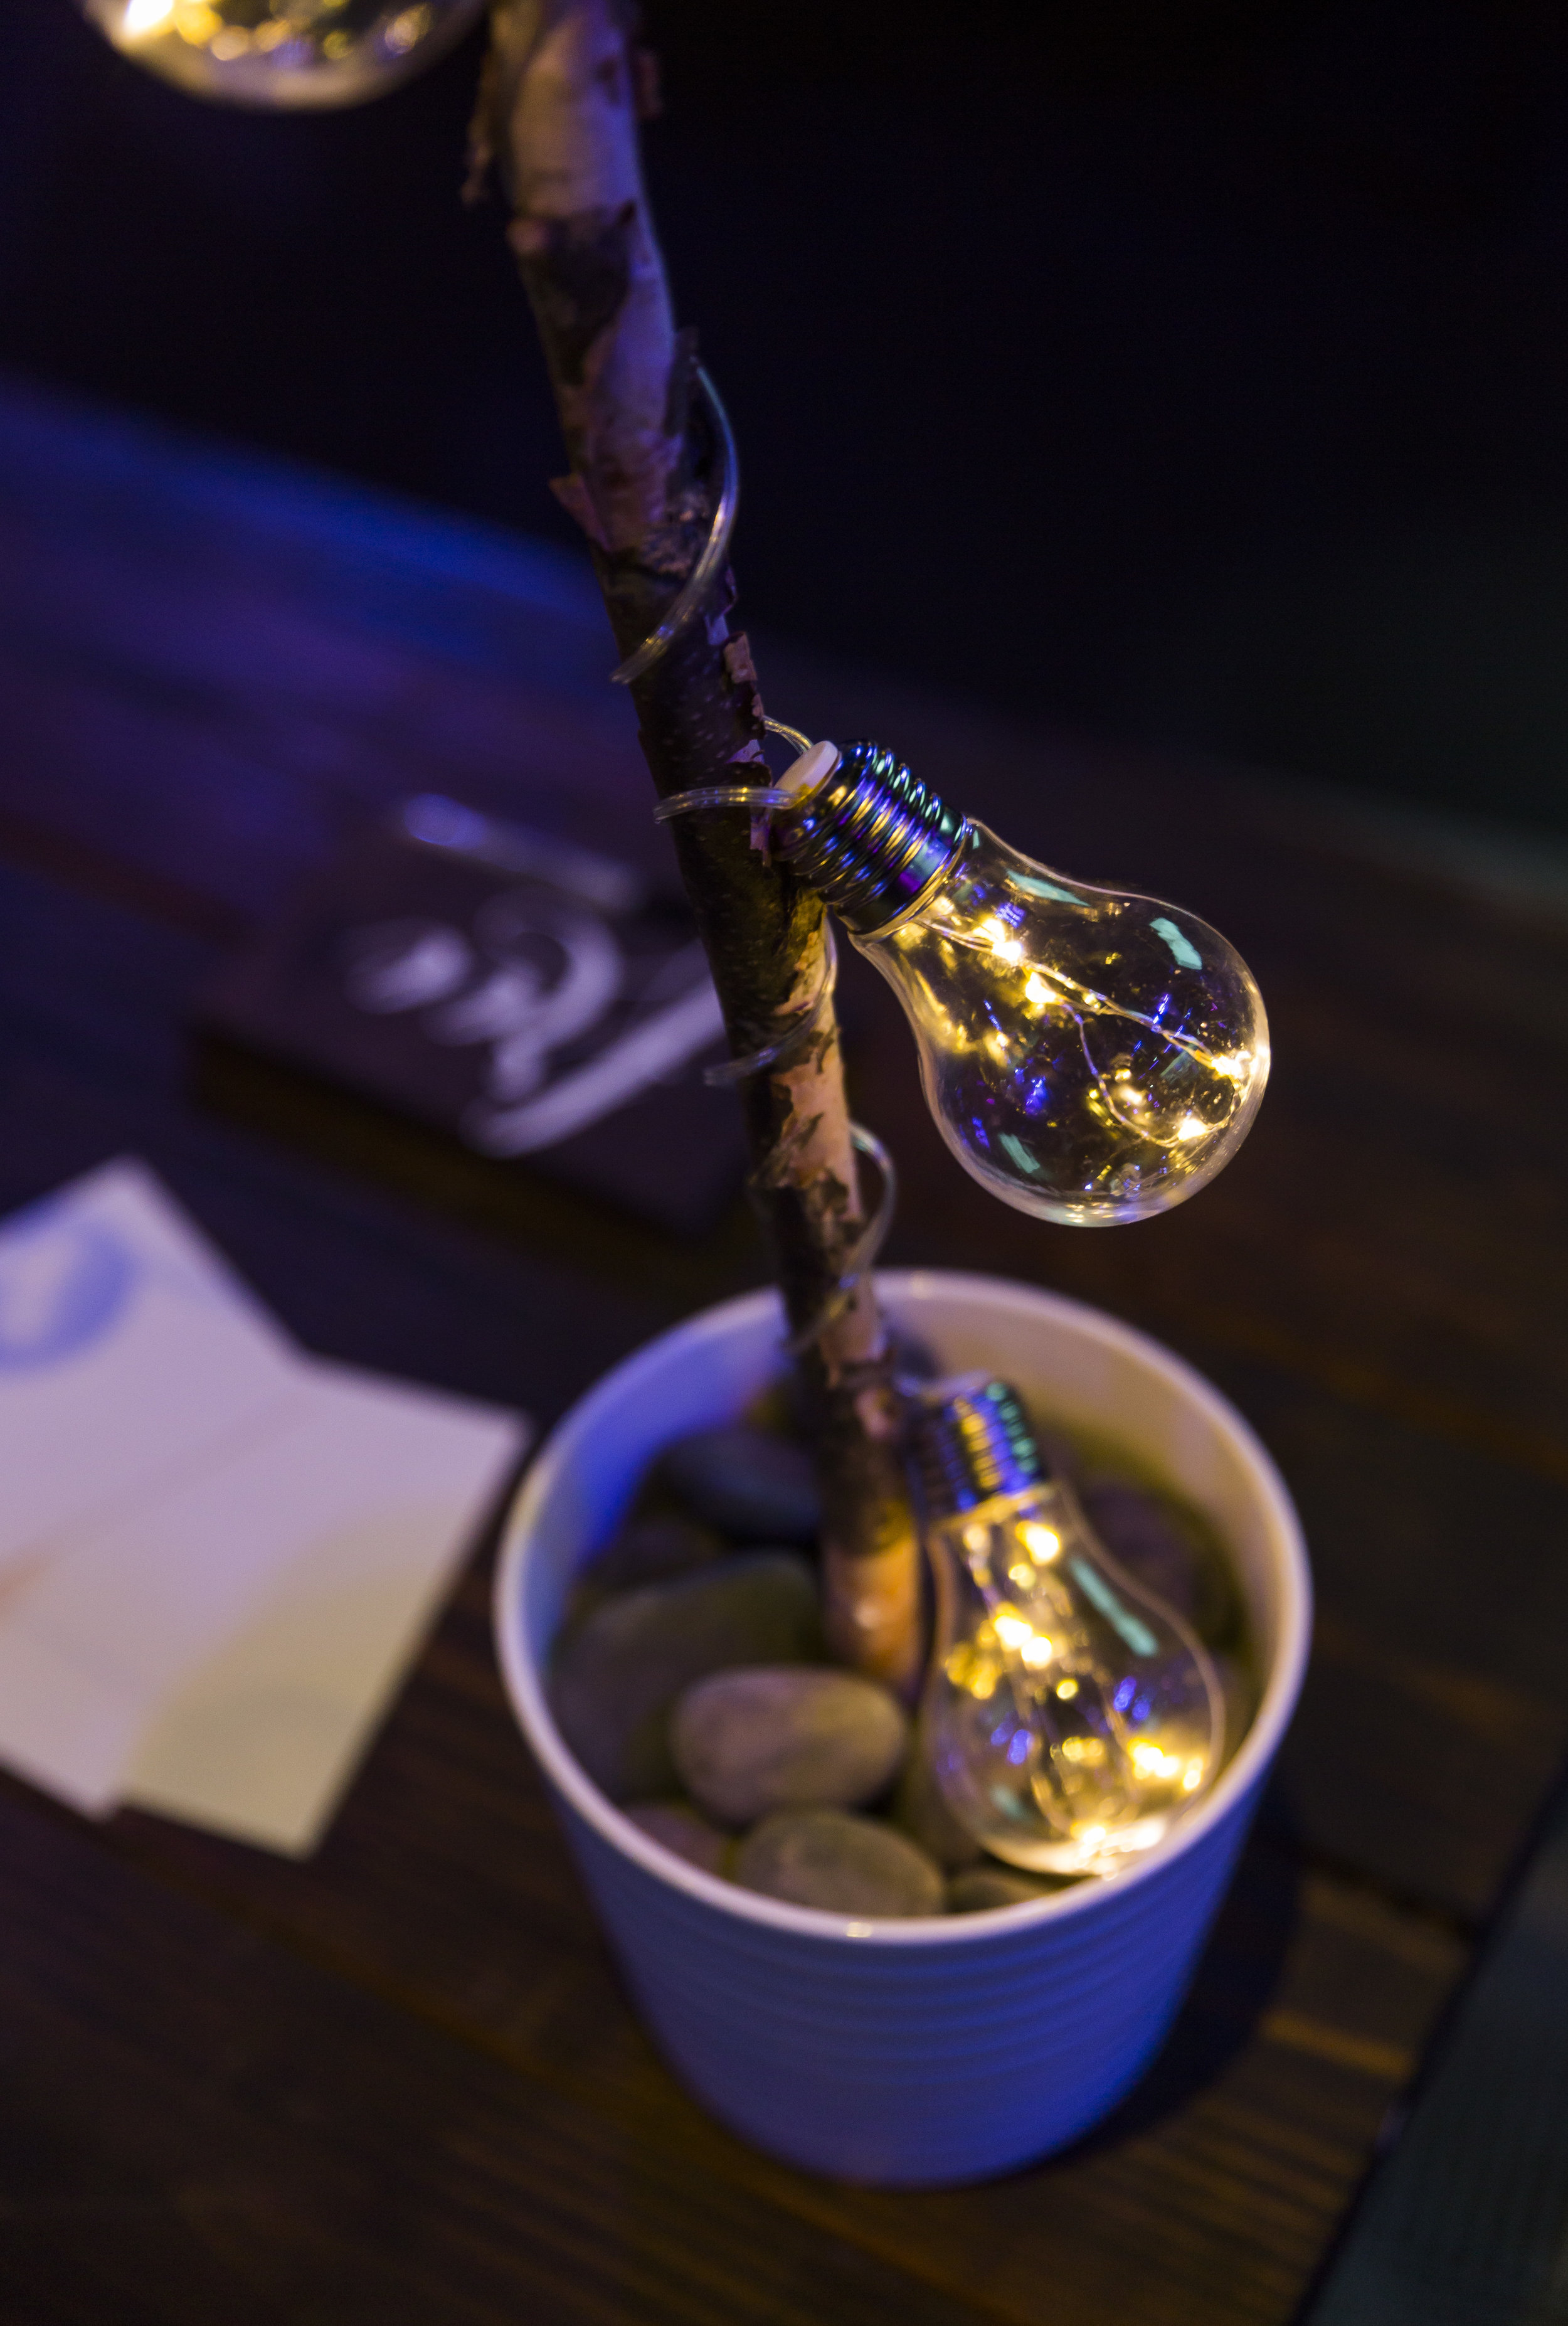
First, I sweet talked my dear husband into cutting all of the birch sticks in half for me, so each centerpiece stands 2ft. high. Each birch log looks a little different, so as he cut them I numbered the bottom of the sticks to make sure each centerpiece matched in both pots. I also had him cut a notch in the top of each log so that the string lights can sit securely on top.

Next, I used the spray foam to secure the logs inside the pot. PLEASE USE GLOVES! This stuff is legit and it will legit take the skin off your hands, so please use caution! It also expands fast, so start with small sprays to get the amount you need.

I filled the pot up a little less than halfway, then used the logs and/or tape to hold them in place while it dried. Allow several hours to fully set.

Once they fully set, you're ready to add the lights and rocks. Wrap the lights around each log and secure in the notch on top of each pole. Finally, bury the battery pack under the pebbles and you're all set!
The great thing about these centerpieces is that you can swap out the rocks for moss or something else cute to match the theme and style of your event - they are very versatile! We finished the look up with a strip of moss in the center of the picnic table and three cute votives.

At our latest event, we also used them on some of the food tables. See more about that event HERE.

I love the soft, outdoorsy look we were able to create with these centerpieces, even when our events were inside. Bonus: they would look awesome in a back yard or on a porch as well!
Photo Credit: Sarah Marie Photography

(DISCLAIMER: This post contains some affiliate links.)